


 English
  русский
  Español
  عربى
عربى  日本語
日本語 
 Home / News / Industry News / What Is a Flange Bearing and How Do You Install, Maintain, and Replace One
What Is a Flange Bearing and How Do You Install, Maintain, and Replace One
 2026.09.21
 Industry News
Content
- 1 What Is a Flange Bearing and Where Does It Belong?
- 2 How a Flange Bearing Is Built
- 3 The Flange Bearing Family: Types and Configurations
- 4 Reading the Numbers: How a Flange Bearing Is Measured
- 5 How to Install Flange Bearing Units Correctly
- 6 How to Remove Flange Bearing from Shaft
- 7 Operating Behaviour and Thermal Stabilisation
- 8 Load and Speed Comparison Across Common Sizes
- 9 Common Problems and What They Indicate
- 10 Maintenance Routines That Extend Service Life
- 11 Selection Sequence for a New Application
- 12 Where Flange Bearings Are Used in Practice
- 13 Dimensional and Fit Reference
- 14 Questions Buyers Ask Before Specifying
- 15 Bringing the Details Together on the Shop Floor
A flange bearing is a housed bearing assembly in which the outer housing carries a machined flange plate drilled with mounting holes. The flange plate allows the unit to be bolted directly onto a machine frame, a panel, a gearbox face or a fabricated end plate. Because the mounting surface itself becomes part of the support structure, a flange bearing removes the need for a separate pedestal, pillow block base or fabricated bracket. For equipment designers working with tight envelopes, this single characteristic often decides whether a shaft can be supported at all.
Understanding what a flange bearing does, how it is measured, how it is installed and how it eventually has to come off the shaft is fundamental to keeping rotating equipment available. The sections below walk through the engineering detail behind each of those stages, with the dimensional tables and operating curves that matter on the shop floor.
4
Core dimensions to record before ordering any flange bearing
6
Standard flange plate patterns in common industrial use
2 h
Typical time for a correctly installed unit to reach thermal stability
±0.05 mm
Practical perpendicularity target for the mounting face
What Is a Flange Bearing and Where Does It Belong?
A flange bearing combines two functions that are usually purchased separately: the rolling element that carries the rotating shaft, and the structural interface that fixes the whole assembly to the machine. In a conventional pillow block arrangement, the housing sits on a base and the base is bolted down from above. In a flange bearing, the housing is turned through ninety degrees and terminated with a flat plate. The plate is the mounting feature. The bolts pass through the plate parallel to the shaft axis rather than perpendicular to it.
That geometric difference produces several practical consequences. First, the shaft can be supported at a wall, a bulkhead or an end plate rather than on a floor or a beam. Second, the shaft length between supports can be shortened, which raises the first critical speed and reduces deflection under belt or chain loads. Third, the bearing position can be adjusted along the shaft axis before final tightening, which is useful when a drive needs to be aligned with a mating component at the opposite end.
Engineers typically reach for a flange bearing in four situations. The first is a thin panel that has to carry a rotating shaft, such as the side wall of a conveyor or the casing of a fan. The second is a shaft that must pass through a plate and be supported on the far side. The third is a compact gearbox or drive unit where there is no room for a pedestal. The fourth is a retrofit, where an existing bolt circle on a casting or a fabrication can be reused instead of machining a new mounting pad.
Wall and Panel Mounting
The flange sits flat against a plate, and the shaft passes through a clearance hole in that plate. Load is transferred into the plate in shear and bending rather than into a floor in compression. Plate thickness and stiffening then become the governing design variables.
End-of-Shaft Support
Where a shaft overhangs from a driven component, a flange bearing at the free end closes the loop. This arrangement is common on screw conveyors, sprocket shafts and small fan rotors where the overhung moment would otherwise be carried entirely by the drive bearing.
Through-Shaft Applications
When the shaft continues past the support point, the flange bearing provides an intermediate support without occupying floor space. Two units can be placed on the same plate to form a short, stiff bearing span.
Retrofit and Replacement
Because the flange pattern can be matched to an existing bolt circle, a flange bearing is often the simplest way to replace a worn or obsolete housing without re-machining the machine frame.
How a Flange Bearing Is Built
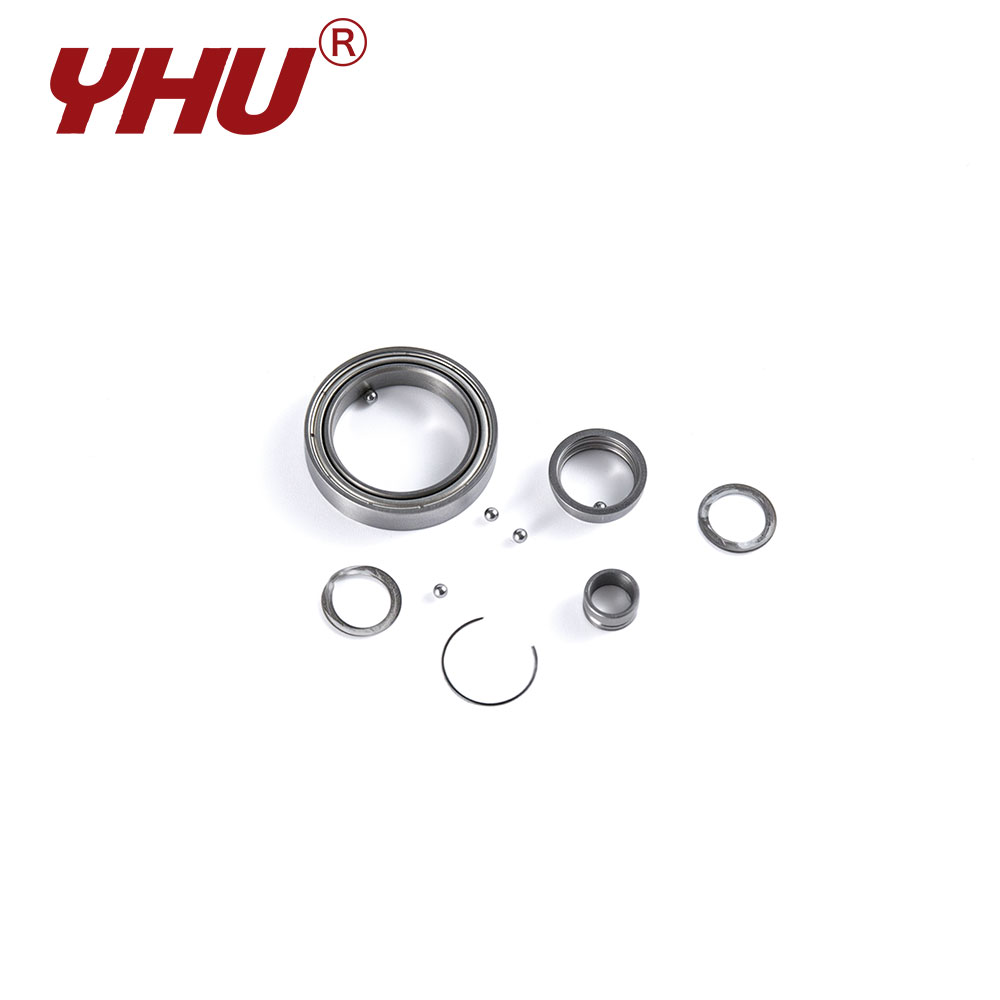
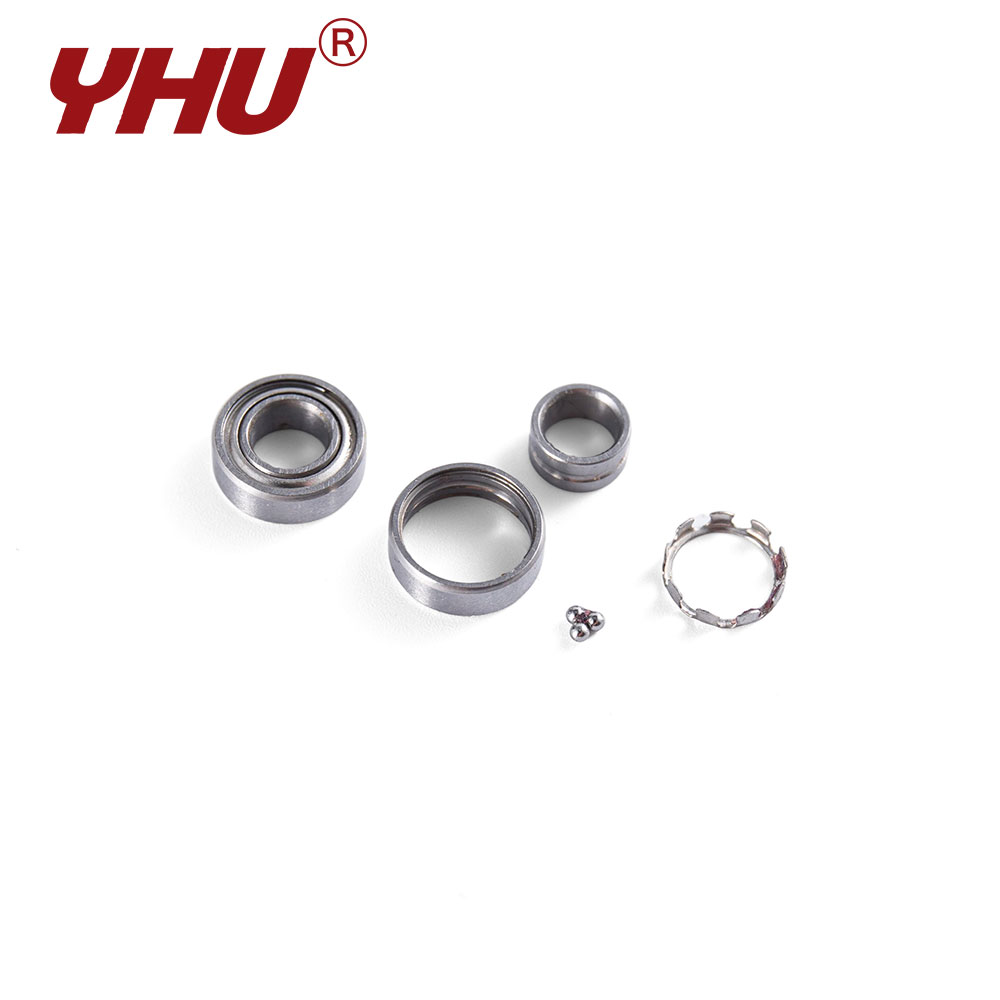
A flange bearing is not a single part but a stack of components that must work together. Working from the outside inward, the assembly normally contains the following elements.
The flange plate is the mounting interface. It may be cast integrally with the housing or pressed and welded from sheet steel. Its face is machined or ground flat so that it seats against the mounting surface without rocking. The bolt holes are usually clearance holes, though some patterns include one slotted hole to allow angular adjustment during alignment.
The housing is the body that holds the bearing outer ring. In a cast housing the bore is machined to a controlled tolerance and often includes a spherical seat so that a self-aligning insert bearing can pivot a few degrees. In a pressed steel housing the bore is formed and then sized, which limits the available misalignment compensation.
The bearing insert or bearing set is the rolling element. The most common form in a flange bearing is a wide inner ring insert with a spherical outside diameter on the outer ring. This combination allows the shaft to run at a small angle to the housing axis without inducing edge loading. Cylindrical roller versions use a straight outer ring and a two-piece housing instead.
The locking device fixes the inner ring to the shaft. It may be two set screws bearing on the shaft, an eccentric collar that rotates into a locking position, or a tapered adapter sleeve. The choice affects runout, axial holding force and how the unit must be removed later.
The seal keeps contaminants out and lubricant in. A flange bearing used in a dusty or wet environment usually has a contact lip seal, sometimes backed by a slinger or a flinger disc. Sealed-for-life units have no relubrication path and rely entirely on the initial grease charge.
The Flange Bearing Family: Types and Configurations
The flange pattern is the first thing most people notice, and it is also the first thing that constrains the installation. Six patterns cover the vast majority of industrial demand.
Two-Bolt Diamond
Two holes placed on the long axis of a diamond-shaped plate. The narrow profile fits between adjacent structures, and the bolt axis is aligned with the dominant load direction. Common on light conveyors, small fans and agricultural implements.
Two-Bolt Oval
A rounded rectangle with two holes on the short axis. The oval footprint gives more bearing area than a diamond for the same bolt spacing, which improves stability when the load reverses.
Four-Bolt Round
Four holes on a square bolt circle around a circular plate. The symmetric pattern distributes load evenly and resists overturning moments better than any two-hole design. Widely used on fans, blowers and process rolls.
Four-Bolt Square
A square plate with four corner holes. The square corners provide more material around each bolt than a round plate, which raises the torque that the flange can transmit before local yielding begins.
Three-Bolt Round
Three holes at 120 degrees. The pattern is self-centring when the bolts are tightened in sequence and is often chosen where one side of the plate is obstructed.
Solid and Split Housings
Split housings allow the bearing to be replaced without disturbing the shaft or the flange bolts. Solid housings are stiffer and are preferred where the flange must resist bending from belt pull.
Beyond geometry, flange bearings separate into three families by rolling element. Ball types carry moderate radial load and light axial load and are the default for general machinery. Cylindrical roller types carry substantially higher radial load at the same envelope and are used on heavy conveyors, mixers and crushers. Needle roller types fit the smallest radial envelope and suit oscillating or low-speed applications where space is the binding constraint.
| Type | Bolt Holes | Relative Radial Capacity | Misalignment Compensation | Typical Duty |
| Ball, diamond flange | 2 | Moderate | Up to about 2 degrees | Light conveying, ventilation |
| Ball, round flange | 4 | Moderate | Up to about 2 degrees | Fans, process rolls, small mixers |
| Ball, square flange | 4 | Moderate | Up to about 2 degrees | General drive shafts, packaging lines |
| Cylindrical roller, round flange | 4 or 6 | High | Very limited | Heavy conveyors, crushers, mixers |
| Needle roller, flange | 2 or 4 | High for its envelope | Very limited | Oscillating pivots, compact linkages |
| Thermoplastic flange | 2 or 4 | Low to moderate | Limited | Wash-down, chemical, food handling |
| Stainless steel flange | 2 or 4 | Moderate | Up to about 2 degrees | Marine, food, pharmaceutical |
Reading the Numbers: How a Flange Bearing Is Measured
Measurement errors are one of the most common reasons a replacement flange bearing does not fit. Four dimensions must be captured on the original part, and each one has a different consequence if it is wrong.
The bore diameter is the inside diameter of the bearing inner ring. It sets the shaft fit. Measure it with an internal micrometer at three positions along the bore and at two orientations ninety degrees apart. Record the smallest value. If the bore has been distorted by set screws, the reading will vary around the circumference and the true size is the minimum.
The housing outside diameter is the diameter of the cylindrical body that sits inside the mounting bore when the flange bearing is a cartridge type. Measure with an external micrometer across two directions. An out-of-round housing will not seat properly and will transmit vibration into the panel.
The flange outside diameter governs clearance to neighbouring components. Measure across the widest part of the plate. For a diamond or oval pattern, also measure the distance across the narrow axis, because that is the dimension that decides whether the unit can be swung into place.
The flange thickness determines bolt grip length and the stiffness of the joint. Measure at four points around the plate. A flange that varies in thickness by more than a few hundredths of a millimetre will tilt when the bolts are tightened, and the tilt is transferred directly into the bearing raceway.
Two additional dimensions are needed when ordering a replacement. The bolt hole spacing is the centre-to-centre distance between mounting holes, measured along both axes for a four-hole pattern. The bolt hole diameter sets the fastener size. On a diamond pattern, also note whether the holes are on the long axis or offset, because both arrangements exist.
Measurement sequence that avoids rework
Bore first, then housing outside diameter, then flange outside diameter, then flange thickness, then bolt spacing, then bolt hole diameter. Recording them in this order matches the order in which a replacement is checked against the shaft, the panel and the existing fastener set, so any mismatch is found before the part is ordered.
How to Install Flange Bearing Units Correctly
The installation sequence decides most of the service life. A flange bearing that is forced into position will run hot from the first minute and will fail early, regardless of its quality.
Step one: verify the mating surfaces. The shaft must be clean, straight and free of burrs, rust and raised key edges. The mounting face must be flat and perpendicular to the shaft axis. A practical target is a perpendicularity deviation no greater than 0.05 mm across the full flange diameter. Check it with a dial indicator mounted on the shaft and swept across the face.
Step two: check the fit. Slide the bearing onto the shaft by hand before any bolting begins. It should move with light resistance. If it must be driven on, the shaft or the bore is out of tolerance. Never correct a tight fit by grinding the shaft with an abrasive disc, because the resulting taper will cause the inner ring to creep.
Step three: seat the unit. Push the bearing into position using a press or a soft-faced mallet applied to the outer ring or the housing, never to the seal, the cage or the inner ring. Keep the flange square to the mounting face as it approaches. If the unit binds, stop and find out why rather than increasing the force.
Step four: tighten the flange bolts. Fit all bolts finger-tight first. Then tighten in a diagonal sequence in three passes: an initial pass at roughly one third of the target torque, a second at two thirds, and a final pass at full torque. This sequence compresses the flange evenly and prevents the plate from bowing between the bolts.
Step five: lock the inner ring. With the flange bolts tight, tighten the set screws, rotate the eccentric collar into engagement, or tighten the adapter sleeve nut according to the specified procedure. Set screws should be tightened alternately and only to the recommended torque. Over-tightening distorts the inner ring and produces a lumpy rotation.
Step six: confirm free rotation. Turn the shaft by hand through several revolutions. Rotation should be smooth with no tight spots, no rubbing and no axial end play beyond the design clearance.
Step seven: run in and observe. Start the machine without load and monitor temperature and vibration for the first two hours. A correctly installed flange bearing reaches a stable temperature within that window. A continuing rise indicates a problem with fit, alignment or lubrication.
Before Installation
Clean shaft and face. Check perpendicularity. Confirm the bore slides on by hand. Verify the bolt circle matches the pattern on the panel.
During Installation
Apply force only to the outer ring or housing. Tighten bolts diagonally in three passes. Lock the inner ring only after the flange is fully seated.
After Installation
Rotate by hand. Run unloaded. Record the stabilised temperature as a baseline for future condition monitoring.
How to Remove Flange Bearing from Shaft
Removal is the mirror image of installation, but the forces involved are usually larger because corrosion and fretting have had time to develop. The objective is to extract the unit without damaging the shaft, the panel or the adjacent components.
Prepare the area first. Remove guards, disconnect the drive, and support the shaft so that it cannot drop when the bearing releases. Mark the axial position of the bearing on the shaft with a scribe line or a piece of tape so that a replacement can be set to the same location.
Release the flange. Loosen the mounting bolts in the reverse of the tightening sequence, a little at a time. On a flange bearing with jacking or push-off holes in the plate, insert set screws into those holes and turn them evenly to break the flange away from the mounting face. This avoids levering against the panel with a pry bar, which often damages both surfaces.
Release the shaft lock. Loosen the set screws, rotate the eccentric collar out of engagement, or slacken the adapter sleeve. If the set screws have raised burrs on the shaft, dress the burrs with a fine stone before attempting to slide the unit off. A raised burr dragged through the bore will score the inner ring and can make the unit impossible to remove without cutting it.
Pull the unit from the shaft. Use a mechanical or hydraulic puller. The jaws must engage the inner ring or the housing, not the seal or the cage. The forcing screw must bear on the shaft end through a soft pad to protect the centre hole. Apply load gradually and keep the puller square to the shaft. If the unit does not move, apply penetrating fluid and allow time for it to work rather than increasing force.
Use heat with care. Controlled heating of the inner ring, typically to no more than 120 degrees Celsius for a standard bearing, will expand it and reduce the interference. Apply heat evenly with an induction heater or a heat gun. Never use an open flame, because local overheating destroys the hardness of the raceway and may warp the ring.
When the bearing is seized. If the inner ring is welded to the shaft by fretting corrosion, a bearing puller with a cutting attachment, or careful use of a thin abrasive cut-off wheel with a depth stop, may be the only practical route. Protect the shaft diameter with a shim so that the wheel does not cut into the journal.
Removal mistakes that shorten shaft life
Prying the flange off the panel with a bar, hammering the inner ring, heating the whole housing instead of the ring, and pulling on the seal or cage are the four most damaging practices. Each one either deforms the shaft, damages the panel face or destroys the bearing before it can be inspected to find the root cause of the failure.
Operating Behaviour and Thermal Stabilisation
Temperature is the simplest and most reliable indicator of whether a flange bearing is running correctly. The curve below compares a healthy installation with one where the flange is not seated squarely, which introduces a bending moment into the housing.
Temperature Stabilisation: Correctly Seated Flange vs. Crooked Flange
The solid curve shows a unit that settles within two hours and then holds a steady value. The dashed curve shows a unit whose temperature continues to climb, which is the signature of edge loading caused by a flange that is not square to the shaft. Continuing to run in this condition accelerates grease breakdown and eventually produces raceway fatigue.
Load and Speed Comparison Across Common Sizes
The chart below illustrates how radial capacity scales with bore size for ball and cylindrical roller flange bearings of the same nominal envelope. The values are indicative and are intended to show the relative trend rather than to serve as a catalogue rating.
Two observations follow from this comparison. First, moving from a ball to a cylindrical roller type of the same bore produces a larger gain in radial capacity than moving up one bore size within the ball family. Second, the roller type gives up misalignment compensation, so the mounting face must be more accurate and the shaft must be stiffer.
Common Problems and What They Indicate
Failures in flange bearings follow recognisable patterns. Reading the pattern correctly is what turns a repair into an improvement.
Overheating
Causes include over-greasing, grease that has separated or hardened, an over-tight shaft fit, excessive seal drag, and load above the design rating. Compare the stabilised temperature against a known-good baseline before assuming the bearing itself is at fault.
Flange Cracking
Almost always a mounting problem. The mounting face is not flat, the bolts have been over-tightened, or the panel flexes under load and imposes a bending moment on the plate. Stiffening the panel is often the correct fix rather than fitting a heavier bearing.
Axial Creep
The inner ring walks along the shaft because the locking device is not holding. Set screws bearing on a hardened shaft, worn eccentric collars and loose adapter sleeves are the usual causes. Creep polishes the shaft and destroys the fit.
Noise and Vibration
A sharp squeal points to sliding contact where rolling should occur. A regular knock once per revolution points to a localised raceway defect. A high-frequency buzz often indicates insufficient preload or a loose housing fit.
Seal Failure
Contamination enters, grease escapes, and the bearing runs dry. In dusty or wet environments, a single lip seal is often not enough; a slinger or a labyrinth arrangement extends life substantially.
Corrosion
Condensation inside the housing during shutdown is a common cause. Where wash-down or marine exposure is expected, a stainless or thermoplastic flange bearing with sealed-for-life lubrication removes the problem at the source.
Maintenance Routines That Extend Service Life
Maintenance for a flange bearing is built around three activities: lubrication, inspection and condition monitoring.
Lubrication. For relubricable units, establish a grease interval based on operating temperature and speed. Higher temperature and higher speed both shorten the interval. Add grease slowly until fresh grease appears at the seal, then stop. Over-filling is a more frequent cause of failure than under-filling, because excess grease churns, heats and eventually bleeds out past the seal.
Inspection. At each scheduled stop, check for grease leakage, listen for changes in sound, feel the housing for abnormal warmth, and confirm that the shaft has not shifted axially. A mark scribed on the shaft next to the inner ring makes axial creep immediately visible.
Condition monitoring. Vibration measurement, either periodic or continuous, detects raceway defects before they become audible. Envelope or shock-pulse techniques are particularly effective on low-speed flange bearings where overall vibration levels change very little even when a defect is developing.
For sealed-for-life units, maintenance reduces to checking the mounting bolts for looseness, confirming that the seal lip has not been damaged, and replacing the unit at the end of its calculated grease life rather than waiting for a failure.
Selection Sequence for a New Application
A structured selection sequence reduces the risk of choosing a flange bearing that fits but does not last.
Define the load. Separate radial and axial components. Include belt pull, chain tension, imbalance and any transient loads from starting or reversing. Apply the appropriate service factor for the driven machine.
Define the speed. Establish the continuous operating speed and the maximum speed. Check both against the limiting speed of the candidate bearing and against the seal's surface speed limit.
Define the environment. Note temperature range, humidity, wash-down, dust, chemical exposure and the presence of abrasive particles. The environment usually decides the housing material and the seal arrangement.
Define the mounting interface. Confirm the available bolt pattern, the panel thickness, the clearance around the flange and the access for tools. A bearing that cannot be reached for maintenance will not be maintained.
Define the alignment capability. If the panel is welded fabrication and the shaft is long, some misalignment compensation is required, which points to a self-aligning ball type. If the structure is rigid and machined, a cylindrical roller type gives more capacity for the same envelope.
Confirm the fit and clearance. Specify the shaft tolerance and the housing bore tolerance that match the chosen bearing. Most premature flange bearing failures trace back to a fit that was never specified, only inherited from whatever the shaft happened to measure.
| Selection Input | What It Decides | Typical Consequence of Getting It Wrong |
| Radial load and direction | Rolling element type and bore size | Fatigue spalling of the raceway |
| Axial load | Whether a locating feature is needed | Axial creep and shaft migration |
| Speed | Lubricant type and seal design | Grease breakdown and rapid temperature rise |
| Temperature range | Housing material and internal clearance | Loss of clearance and seizure at operating temperature |
| Contamination level | Seal arrangement | Abrasive ingress and accelerated wear |
| Mounting face accuracy | Self-aligning or rigid housing | Edge loading and flange cracking |
| Panel stiffness | Flange plate thickness and bolt pattern | Panel flexure and bolt fatigue |
Where Flange Bearings Are Used in Practice
Bulk handling equipment is the largest single application area. A flange bearing at the tail end of a belt conveyor supports the return shaft against a side plate, and a second unit at the head end supports the drive shaft. The short bearing span keeps shaft deflection low, which extends belt tracking stability.
Agricultural machinery uses diamond flange bearings on planter row units, auger drives and fan shafts. The diamond pattern fits between adjacent structures, and the self-aligning insert tolerates the frame flexure that comes with field operation.
Ventilation and air handling equipment uses round and square four-bolt flange bearings on fan shafts. The flange is bolted to the fan casing, and the shaft passes through the inlet. Because the fan wheel is overhung, the bearing must carry a significant moment, which is why four-hole patterns dominate this application.
Food processing and packaging lines use thermoplastic and stainless steel flange bearings in wash-down zones. Sealed-for-life lubrication and corrosion-resistant housings allow the equipment to be hosed down without dismantling the bearing supports.
Material processing equipment such as mixers, screw conveyors and small crushers uses cylindrical roller flange bearings. The high radial capacity handles the uneven loading that comes with variable bulk density and occasional foreign objects in the product stream.
Dimensional and Fit Reference
The table below summarises the dimensional checks and the practical fit ranges that apply to most general-purpose flange bearing installations. Values are given as a working reference and should be confirmed against the specific product specification before machining.
| Check | Measuring Tool | Typical Target | Effect If Out of Range |
| Shaft diameter at bearing seat | External micrometer, three positions | Within the specified bore tolerance | Inner ring creep or excessive interference |
| Bore diameter | Internal micrometer, two orientations | Round within a few micrometres | Localised load and noisy rotation |
| Mounting face perpendicularity | Dial indicator swept on the shaft | 0.05 mm or better across the flange | Flange distortion and edge loading |
| Flange thickness variation | Depth micrometer, four points | Consistent around the plate | Bolt tightening tilts the housing |
| Bolt hole spacing | Vernier caliper or steel rule | Matches the panel pattern within 0.2 mm | Bolts bind and the flange is stressed |
| Axial position on shaft | Scribe mark or depth gauge | Per drawing or the original setting | Misalignment with the mating component |
Questions Buyers Ask Before Specifying
Can a flange bearing carry axial load? Ball insert types carry light axial load in one or both directions depending on the internal design. Where the axial load is significant, a locating shoulder or a separate thrust arrangement is required, because the flange bolts are not intended to resist shaft thrust.
Does the flange have to be bolted to a machined surface? It does not have to be machined, but it must be flat and stiff. A welded plate that has distorted will transfer that distortion into the bearing. If the plate cannot be machined, a thick washer or a machined pad under each bolt can help, but the better solution is to stiffen the plate.
How much misalignment can be tolerated? A self-aligning insert typically accepts up to about two degrees. Beyond that, the seal lip loses contact and the spherical seat may bottom out. Rigid cylindrical roller housings accept almost none, which is why their mounting faces must be more accurate.
Can a flange bearing be relubricated in place? Units fitted with a grease nipple can be relubricated without removal, provided there is access to the fitting and a path for old grease to escape. Sealed-for-life units cannot, and their service life is fixed by the initial grease charge.
What is the difference between a flange bearing and a flanged cartridge? A flange bearing normally includes the housing and the bearing as one unit, with the flange cast or formed as part of the housing. A flanged cartridge is a bearing insert designed to be pressed into a separate flanged housing. The two are often interchangeable in function but differ in how they are replaced.
Bringing the Details Together on the Shop Floor
The performance of a flange bearing is decided long before it is fitted. It is decided when the load is calculated, when the mounting plate is designed, when the shaft tolerance is specified, and when the bolt pattern is chosen. Every one of those decisions shows up later as a temperature reading, a vibration signature or a maintenance interval.
On the shop floor, three habits cover most of the risk. Record the four core dimensions of every unit before ordering a replacement, so that the fit is confirmed rather than assumed. Tighten flange bolts diagonally in three passes, so that the plate seats flat instead of bowing. And record the stabilised running temperature of every new installation, because that single number becomes the most useful diagnostic reference the maintenance team will have for the rest of the machine's life.
When a unit does have to come off, the same care applies in reverse. Supporting the shaft, releasing the lock before pulling, applying force to the inner ring rather than the seal, and using controlled heat instead of an open flame will preserve both the shaft and the panel for the next bearing that goes on. The cost of a flange bearing is a small fraction of the cost of the downtime that surrounds it, and the practices that protect the surrounding structure are what keep that downtime short.
Message Feedback

Professional Manufacturer of Precision Bearings
- Contact Information
-
-
+86 162 6918 9999 +86 136 1619 2555

-
+86 153 0641 4247

-
jeffrey@yhu1988.com

rose@yhu1988.com -
Yinghong Industrial Park, Zexin Avenue, Xingou Auto Parts Industrial Park, Funing County, Yancheng City, Jiangsu Province, China

-
- QR Code
Copyright ©
Jiangsu Yinghong Transmission Technology Co., Ltd.
All Rights Reserved.
Custom Miniature Ball Bearing Manufacturers

